Tuesday, September 28, 2010

Nineteen

Taylor woke up and made me breakfast, and then we cuddled up and watched a movie and played phase ten (one of my favourite card games). After getting ready for the day and eating some lunch Taylor gave me my first clue. Which led me to the next and the next and the next. By the end I had collected my clues, a porcupine, a shoe, a boot, a couch, a flag, a star! Then I got to trade them in for money, shopping money :) What more could a girl ask for! Then we did just that, we went shopping.

Then we went to class and I came home to this on the bed!!


Then he locked me away in the TV room and started making dinner. I had no clue what he was going to make but I knew it was from scratch and it smelt heavenly.


My mothers homemade sweet and sour meatballs, something she would make me on my birthday when I was little. I was so shocked and absolutely thrilled, I definitely fell more in love with him right then. Also served along with sparkling apple cider. The best part was that I didn't know it was the exact recipe as my moms, until I took a bite. It tasted just like her's... well pretty close anyway!


Then I blew out my birthday match, on my raspberry lime cloud cupcake!
It was such a wonderful birthday, Taylor did such a wonderful job making my birthday last all day long. It was definitely one of my funnest.

Family Pictures

We won a free photo shoot, and I am in love with these pictures! I also love that were married in them :) I will post the ones I have, were getting all of them later this week so here's what we have so far!


Sunday, September 26, 2010

Easy Fabric Flowers

My Cousin Katie requested I show how to make these cute cheap head bands. I am in love with them, they are fun, easy, inexpensive and add so much to an outfit. You can always make these flowers and pin them to a plain t-shirt or bag. I plan on making one for a new plain dress I bought, but anyways...

You will need:
Headband, clip, or pin (whatever you decide to apply your flower to)
Glue gun
Iron
Fabric
(Also you may want a button)

1. Take your fabric and cut out a long thick piece, the longer the wider the flower, the thicker the fatter your flower will be. So really its up to you.


2. Fold the edge and iron it down flat, then repeat to the other side 


2. Then fold this in half and iron flat. Your fabric should look all clean, with no raw edges.


3. Cut out a circle the size you would like your flower to be. I used felt here for something thicker, but using you're matching fabric works wonderful!


4. Take your fabric and fold each corner down to make a point, like shown.


5. Glue this down to the middle of your circle and hold, wait till glue has dried.


6. While twisting your fabric continue to glue it down to your circle as you go around while continuing to twist you're fabric. 
7. When you get to the end cut off any extra and tuck in and glue, or fold underneath circle and glue to back.


8. Then repeat if you want two flowers, I did so I made another one in a cream paisley, and made it bigger then the last. I then glue the little green flower to over lap my cream flower.


9. Make sure you plan where you want your flower(s) in a mirror before glueing, then glue it to your headband. (If you choose to put it on a safety pin you can get a piece of felt, and glue the safety pin between the flower and felt.)


10. Put it on and start accessorizing! Hope that helped anyone interested in making these. 


I work tuesday, wednesday, friday and Taylor works monday, thursday, and saturday. As you can see this is a very conflicting schedule. Taylor is alone half the week and then I am home alone half the week. So we both needed to pick up a hobby he bought a new game and I started making tooo much food. After a very bad large bubbling burn on my arm and a broken glass bowl I decided I needed to do something a little less fattening and exhausting. So Taylor took me to walmart, picked me out a glue gun and helped me choose my fabrics...


And I made this. 


I forgot to buy buttons, and as you can see it was my first try, but it was really fun and I have already found ways to make them better. I am looking forward to making more, and making them better. I also plan on adding some of these to my old t-shirts to make my old clothes new!

Saturday, September 25, 2010

Raspberry Lime Cloud Saturday


Lime Test, and there was even more. I managed to zest my finger in the process which is painful!


Raspberry Lime Curd


First time making Whipping Cream, Mmmmm


(click above for recipe)


I was very proud to show Taylor when he got home from work, so he insisted he take my picture with the cupcakes. As most of you saw I made cupcakes just a couple days ago, Taylor ate one and well... he doesn't like cupcakes that much I learned. After we ate our dinner, which was homemade and delicious! I past Taylor a cupcake and watched him intently. He took his first bite, his eyes went big and he said "Wow, good job babe!" finished it off and reached for another. Taylor doesn't take seconds for desert, or a lot of desert at all he would rather snacks! So him taking two made my day. Then I took my first bite, and Wow! Don't mean to brag, it was mostly the cupcake recipe not me, but they are soooo yummy. I have never tasted such a great cupcake in my life!

Thursday, September 23, 2010

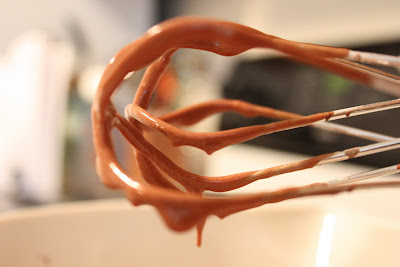
Chocolate Peanut Butter Cupcake


I had so much fun today documenting my baking. Tonight I will cook more!


Mmmm mmm Good!!